Surface roughness measurement
Surface roughness measurement
This is a function to perform JIS-conforming line surface roughness measurement and ISO-conforming area surface roughness measurement. A contact-type tool cannot perform measurement on soft samples or samples with ultrafine surface structures, the inside of which the stylus cannot reach. The confocal microscope of HYBRID+, on the other hand, is a non-contact measurement tool that visualizes ultrafine topography and performs measurement with high precision. A contact-type tool may give inconsistent results, depending on the direction of probe scan. The confocal microscope of HYBRID+ provides accurate measurement results consistently, regardless of scan direction, because its roughness calculation is based on two dimensional height data.
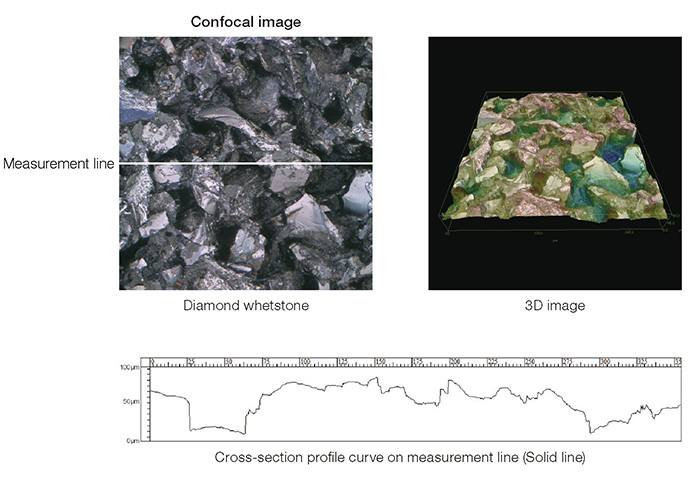
In the example below, line surface roughness measurement is performed on a diamond whetstone, and a profile of cross section is drawn. (Photo on the left: color all-in-focus image, Photo on the right: 3D display, Graph: cross-sectional profile)

Line surface roughness measurement (conforming to JIS B0601)
You can perform measurement at the location of your choice on an image you capture. Accurate measurement at the exact location is possible.
Area surface roughness measurement (conforming to ISO 25178)
You can perform accurate measurement consistently regardless of scan direction. Area surface roughness measurement is a good application for the confocal microscope because it captures the 3D data of measurement surface. The ISO standard is applicable not only to contact-type tools but also to non-contact tools (using a photo probe) as well.
Surface roughness parameter suggestion
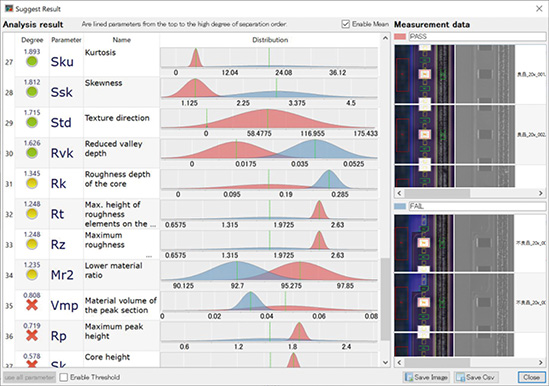
This is a function to automatically compare multiple samples in two groups and display a list of parameters with gaps in the descending order. This is useful for determining which parameters should be used for qualification judgment.

You might also be interested in


