Phase shift interferometry measurement
This is a capability to precisely calculate height distribution with high resolution based on the analysis of phase shift in 4 interference images obtained by precisely moving the objective lens in steps along the optical axis. This is possible because the interference fringes generated by a combination of monochromatic light and a two-beam interference lens correspond to the differences in the optical path length from the sample. The maximum range of height measurement is the distance of half the wavelength of light used for measurement. Measurement takes only a few seconds, much shorter than vertical scanning white light interferometry measurement, because it is conducted not continuously but in steps.
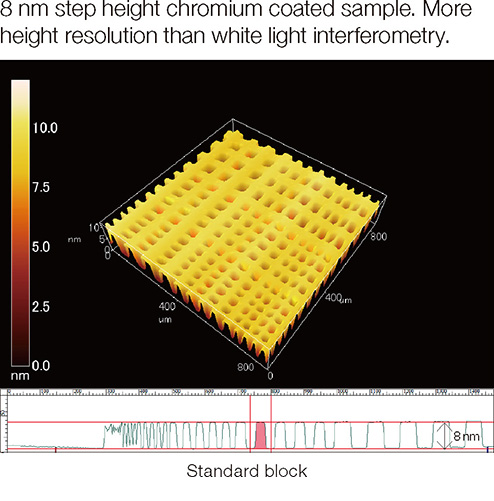
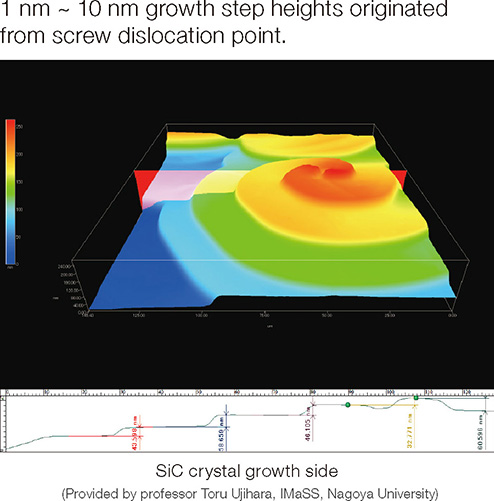
As shown below, the measurement of a 8nm height standard piece is possible. It is also possible to measure a surface height difference in crystal growth from 1 to several nanometers.


Measurement of nanometer-scale scratches and surface roughness
Applications include the measurement and analysis of defect topography on wafers during wafer polishing process.
You might also be interested in


