Vertical scanning white light interferometry measurement
Vertical scanning white light interferometry measurement is a method of scanning a sample along the optical axis, capturing the Z value where the intensity of the interference fringe caused by white light and two-beam interference lens becomes the highest, and calculating a distribution of height for the sample. According to its operation principle, the accuracy of its height measurement is independent of the NA of the objective lens. Since it achieves the same level of resolution regardless of magnification scale, it is suitable for profile measurement at low magnification with a large field of view. You can perform operation in the same way as you do for confocal microscope operation.
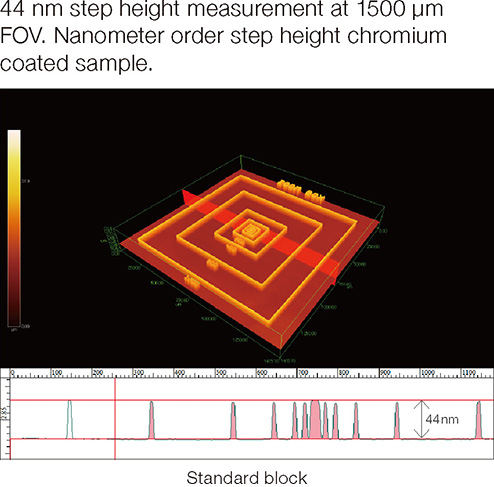
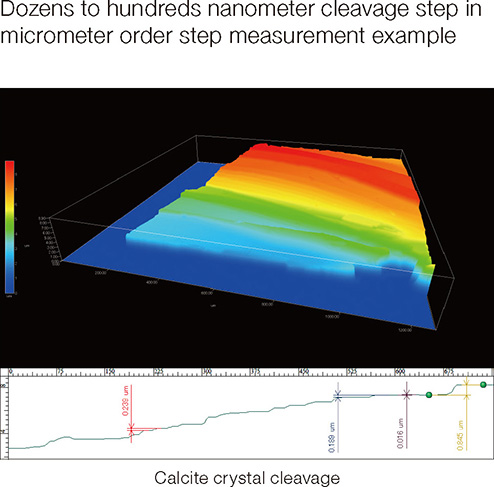
Examples are shown in the pictures below. The left picture shows a result of the measurement of a 40nm height standard piece with a large 1500µm field of view. The picture on the right shows a cleavage plane of calcite with steps, each having a height of tens of nanometers, within a range of several micrometers.


Ultrafine topography measurement with wide field of view
Applications include nanometer-scale topography measurement on wafers and films and micrometer-scale undulation measurement in a large area. Measurement of bump height or gradually-sloped surface is another potential application.
You might also be interested in


